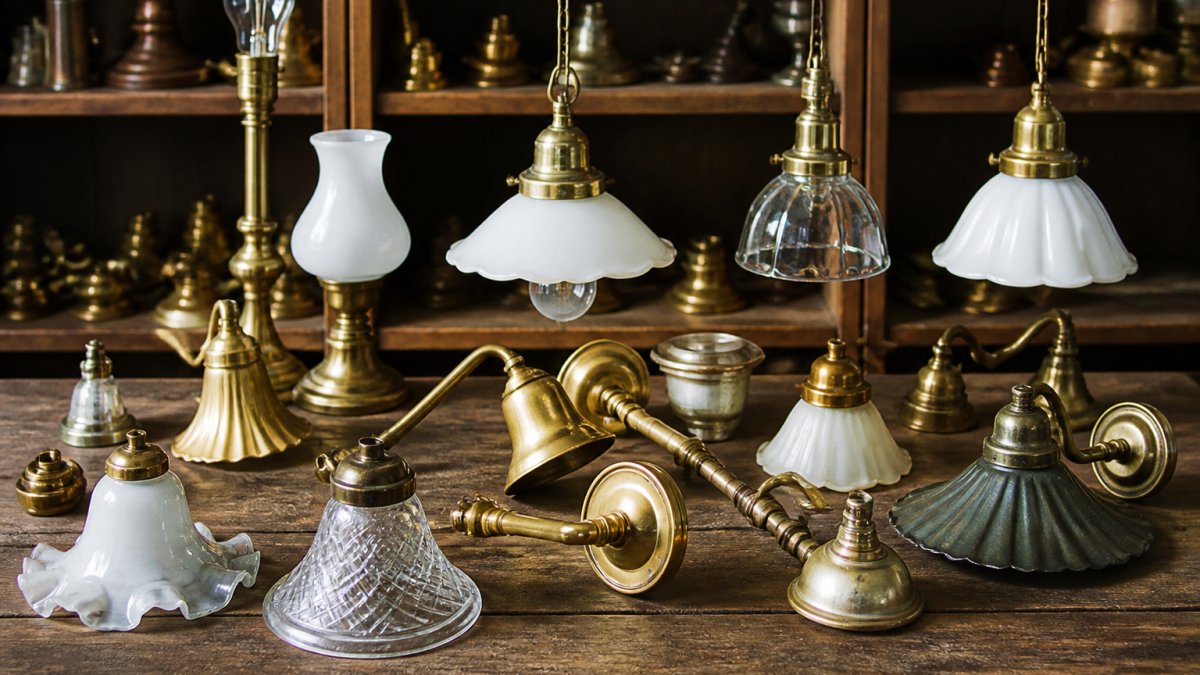
Last Updated: October 30, 2026
Quick Summary
Authentic period lighting for colonial homes means matching the era's light behaviour, not just its catalogue. Choose warm globes in the 2700K to 3000K range, pair sconces evenly, and date the room first, since colonial styles span roughly two centuries. Use antiques where the eye lands and reproductions where you need repetition.
- Warm white globes in the 2700K to 3000K range mimic flame rather than fluorescent tubes.
- Mount wall lights 167 to 183 cm from the floor so the glow lands at eye level.
- Repeat pendants every 2 to 3 metres in hallways rather than varying the fixtures.
- Ask for a close-up of the joint and backplate, the most revealing photo when buying.
- Use antiques in feature rooms and reproductions for hallways and matching sconce pairs.
Table of Contents
- Why Authentic Period Lighting Matters in Colonial Homes
- Colonial Home Lighting Ideas That Stay True to the Era
- Period Lighting Fixtures: Telling Reproduction From Inspired
- Federation-Style Lighting and Its Colonial Roots
- Choosing Lighting for Historic Homes: A Room-by-Room Plan
- Electrifying Antique and Reproduction Fixtures Safely
- Buying, Restoring and Maintaining Period Lights
- Sourcing Your Period Lighting With Expert Help
- Frequently Asked Questions
Why Authentic Period Lighting Matters in Colonial Homes
Walk into a colonial home lit by a single cool-white downlight and the room fights itself. The joinery says 1840. The light says car park.
Light shapes how a room reads.
Here's the point most guides miss: authenticity isn't about matching a catalogue. It's about matching the era's light behaviour. Below, we'll show you how to get that right, room by room.
Colonial Home Lighting Ideas That Stay True to the Era
The best colonial home lighting ideas start with what people actually used before electricity. Candlelight, oil lamps, whale-oil lamps and gas lamps all produced a small, warm, low pool of light.
That history gives you a design brief:
- Lanterns for entries and outbuildings, usually with glass panels
- Wall sconces flanking doorways and mirrors
- Pendant lights over tables and hallways
- Chandeliers in formal rooms, often with bell shades
- Simple design elements over ornament, in the Early American tradition
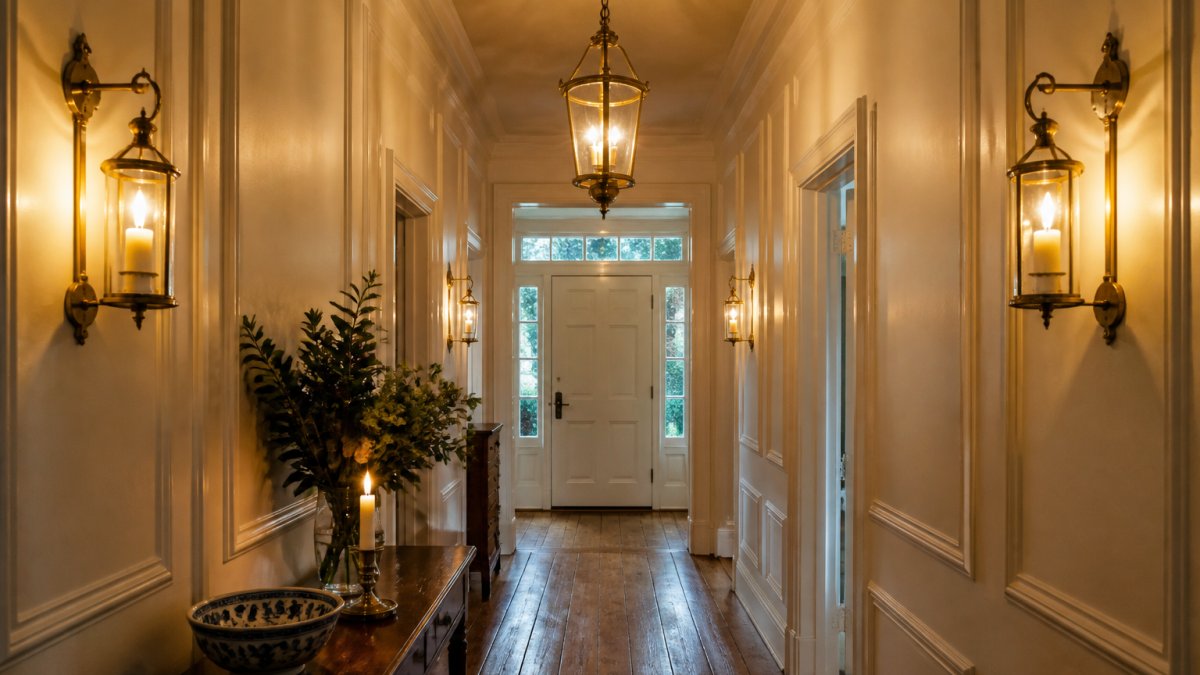
Lanterns, Sconces and Chandeliers by Room
Symmetry does most of the work in these homes. Pair sconces evenly. Centre the pendant. Keep the fixture sizes consistent across a sightline.
Formal rooms can carry a chandelier. Service areas suit a single lantern. Hallways need repetition, not variety.
Period Lighting Fixtures: Telling Reproduction From Inspired
Period lighting fixtures fall into two camps: historically accurate reproductions and colonial-inspired designs. The difference is construction, not styling. Most guides stop at that sentence.
Authentic reproduction lighting copies the original method, using metal that is cut, formed and soldered. Inspired designs borrow the look and may skip the method. Neither is wrong. But you should know which one you're buying, and which era it is pretending to be.
Lighting by Colonial Era and Regional Tradition
"Colonial" is not one style. It is a span of roughly two centuries, and the fixtures changed with the fuel, the fashion and the region. If you want authentic period lighting, start by dating the room.
- Early colonial (roughly 1600s to early 1700s): iron, tin and simple wood. Candle and rushlight holders, betty lamps, small punched-tin lanterns. Plain, heavy, local. Ornament is minimal because the light source was weak and the metalworker was local.
- Georgian (roughly 1714 to 1830s): symmetry, proportion and classical detail arrive. Brass and copper become more common, chandeliers appear in formal rooms, and sconces are paired to flank mirrors and doorways. This is the era most people picture when they say "colonial."
- Federal and late colonial (roughly 1780s to 1830s): lighter proportions, finer brass, more delicate arms on chandeliers, and the beginnings of the glass-hung fixture.
- Federation (roughly 1890s to 1910s): the colonial vocabulary returns with added ornament, scrollwork, fluted stems, coloured glass and more elaborate brass. See the next section for how to handle it.
Regional tradition matters as much as date. Coastal and port towns imported finer brass and glass earlier; inland and rural homes stayed with local iron, tin and timber far longer.
An Authenticity Checklist You Can Use in the Shop
Run these checks before you commit. They separate a genuine reproduction from a colonial-inspired design, and they work whether you are buying in person or asking for detail by email.
- Metal finish: unlacquered brass, aged brass, copper, flat black or oil-rubbed bronze. Chrome reads modern. Ask whether the finish is applied or will patinate naturally.
- Joints: visible, tidy solder lines, not hidden welds. Ask for a close-up of the joint and the backplate, this is the single most revealing photo.
- Glass: real glass panels or shades with slight variation. Perfectly uniform glass usually means a moulded modern panel.
- Weight: solid brass feels heavy in the hand. Hollow spun metal does not.
- Fixings: period-correct screws and backplates. Modern Pozidriv screws on a "period" fixture are a tell.
Federation-Style Lighting and Its Colonial Roots
Federation-style lighting inherits the colonial vocabulary and adds ornament. Where Early American design stayed plain, Federation fixtures lean on European influence: scrollwork, fluted stems, coloured glass and more elaborate brass lights.
The lineage runs through traditional lighting forms. Lanterns, sconces and chandeliers all survive. The decoration changes.
If your home is Federation-era, you have room to be more decorative than a strict colonial brief allows.
Choosing Lighting for Historic Homes: A Room-by-Room Plan
Choosing lighting for historic homes works best as a layered plan, not a shopping list. Build three layers: ambient, task and accent.
Start with the room's original light source. A dining room lit by a chandelier and candles needs a central fixture plus sconces. A hallway needs repeated pendants at intervals.
Mount wall lights 167 to 183 cm from the floor, per Lighting for Historic Homes: How to Choose Period-Appropriate Fixtures, so the glow lands at eye level rather than above it.
Layering Light in Hallways, Living Rooms and Entryways
- Entryway: one lantern or pendant, two sconces, warm globes
- Hallway: repeated pendants every 2 to 3 metres
- Living room: ceiling fixture plus floor and table lamps
- Dining room: chandelier centred on the table, dimmable
Dimmable LED globes let you drop the level at night. That single change does more for period atmosphere than any fixture swap.
Electrifying Antique and Reproduction Fixtures Safely
Electrifying an antique fixture is where enthusiasm meets regulation. Electrical work should be carried out by a licensed electrician. Don't rewire a fixture yourself.
Before any work, have the fixture inspected for:
- Cracked or perished insulation on original flex
- Missing earth continuity
- Heat damage near the lampholder
- Loose or corroded brass fittings
Reproduction lighting is simpler. Buy fixtures with current certification and let the electrician handle the connection.
Watch out: mixing old brass fittings with modern high-wattage globes can overheat a shade designed for candle bulbs. Match the globe to the fixture's original rating.
Buying, Restoring and Maintaining Period Lights
Buying well comes down to three decisions: antique, reproduction, or custom. Most guides leave it there. The useful version is knowing how to assess condition, what restoration actually involves, and how to keep the fixture right once it is up.
Antique, Reproduction or Custom: The Real Trade-offs
| Option | Best For | Watch Out For |
|---|---|---|
| Antique original | Feature rooms, one-off pieces, homes with documented history | Hidden rewiring faults, mismatched replacement parts, undisclosed repairs |
| Reproduction | Whole-house consistency, matching a set across rooms | Vague construction detail, finishes that will not patinate |
| Custom build | Matching an existing fixture exactly, unusual proportions | Longer lead times, and you carry the design risk |
Best for: heritage-listed homes needing exact matches. Skip if: you want a quick cosmetic update.
A practical rule: use antiques where the eye lands and the history matters, and reproductions where you need repetition, hallways, matching sconce pairs, a run of pendants. Custom is for the one fixture you cannot otherwise match.
Assessing Condition Before You Buy
For an antique, inspect in this order:
- Structure: cracks at the arm joints, bends in the stem, missing or replaced finials.
- Metal: active corrosion, deep pitting, or a finish that has been stripped and re-lacquered badly.
- Glass: chips at the panel edges, hairline cracks near the fitter, mismatched shades.
- Electricals (if already wired): perished flex, missing earth continuity, heat damage near the lampholder, loose or corroded brass fittings.
- Completeness: original canopy, chain, ceiling plate and screws. Missing fittings are the hardest thing to replace convincingly.
For a reproduction, the checklist in the previous section applies. Ask which original it is based on and whether the finish is intended to patinate.
Restoration: What to Do and What to Leave Alone
Restoration is about stabilising, not shining. Clean gently, stabilise corrosion, replace perished flex and damaged lampholders, and stop. Over-restoration destroys the patina that makes an antique read as old.
- Unlacquered brass is meant to patinate. Do not polish it back to shine; a soft clean with a non-abrasive cloth is enough.
- Lacquered brass should be left alone until the lacquer fails, then re-lacquered by someone who knows period finishes.
- Glass panels should be dusted with a soft brush, not scrubbed.
- Solder joints should be checked annually for hairline cracks, especially on chandelier arms.
- Original flex should be replaced, not reused, even if it looks intact.
Ongoing Maintenance
A short annual routine keeps period fixtures safe and correct:
- Dust glass and shades with a soft brush.
- Check solder joints and arm fixings for movement.
- Confirm the globe wattage matches the fixture's original rating, mixing old brass fittings with modern high-wattage globes can overheat a shade designed for candle bulbs.
- Have the wiring inspected periodically by a licensed electrician, particularly on fixtures that were rewired years ago.
Maintenance is where most owners slip. The fixtures that survive best are the ones that are cleaned gently and inspected regularly, not the ones that are polished hardest.
Sourcing Your Period Lighting With Expert Help
Sourcing is the step that decides whether the project holds together. Get the era, the finish and the construction right, and everything else follows.
We offer a comprehensive selection of period lighting, cast iron fireplaces and architectural details in one place, backed by 35 years of experience. For current prices and a quote, visit the Restoration Station website.
The International Dark-Sky Association's model guidance is worth reading if your exterior lighting borders a sensitive area. It recommends light that is useful, targeted and low in intensity. Good advice for any period home.
Frequently Asked Questions
What types of lighting were used in colonial homes?
Early colonial homes relied on candlelight, then oil lamps and later whale-oil and gas lamps, all flame-lit and hung from simple metal or timber fittings. Today's period lighting recreates those forms as lanterns, wall sconces, pendant lights and chandeliers. When selecting fixtures for a colonial home, look for warm white globes around 2700K to 3000K and non-reflective finishes such as unlacquered brass or aged bronze, which read as authentic rather than shiny and modern.
Can period-style lights be used with modern wiring?
Yes, provided the fixture is properly earthed and installed by a licensed electrician. Reproduction period lighting is usually built for modern wiring from the start, while genuine antiques often need rewiring before use. Ask whether a fixture has been electrically tested, and have your electrician check the fitting and earthing before it goes up.
How do I choose period lighting fixtures for a Federation-style home?
Federation-style lighting sits later than early colonial design, so expect more decorative brass, coloured glass shades and pendant lights with bell or tulip shapes. Match the finish to the home's existing hardware, favour handcrafted construction over high-gloss modern finishes, and keep ceiling heights in mind when sizing pendants. Mount wall lights around 167 to 183 centimetres from the floor for a balanced look. If you are unsure which era suits your property, ask a specialist to review photos of your home's original features.
Getting period lighting right across a whole house is harder than picking one lantern. Eras blur, reproductions vary, and one wrong finish can pull a room out of character. Restoration Station can take that weight off your project, with period lighting, cast iron fireplaces and architectural hardware from a single source, plus expert advice built on 35 years in restoration. Get started with Restoration Station and light your colonial home the way it was meant to be seen.