Last Updated: November 1, 2026
Quick Summary
Restoring a cast iron fireplace as a beginner starts with assessing its condition, then cleaning, stripping old paint, and treating rust before protecting the bare metal. Test for lead paint first, use proper protective gear, and call a specialist for structural cracks or load-bearing repairs.
- Tap the surface: a clear ring suggests sound metal, while a dull thud can point to cracking.
- Test old paint for lead with a hardware-store kit before sanding or scraping heavily.
- Soak light rust in white vinegar for a few hours, then scrub with a wire brush.
- Apply rust-inhibiting primer or light oil to bare iron the same day it is dried.
- Have a qualified chimney sweep check the flue and connection before first use.
Table of Contents
- Assessing Your Cast Iron Fireplace Before You Start
- Gathering Cast Iron Fireplace Restoration Tools and Safety Gear
- How to Clean a Cast Iron Fireplace Before Stripping
- Removing Old Paint and Treating Cast Iron Fireplace Rust Removal Steps
- Repairing Cracks, Missing Parts and Choosing a Finish
- Cast Iron Fireplace Safety Inspection Before Recommissioning
- Booking Your Next Step With Restoration Station
- Frequently Asked Questions
Restoring a cast iron fireplace is one of the most rewarding jobs a heritage homeowner can take on, and a beginner can do much of it well with patience and the right approach. This guide walks you through each stage, from checking what you have to finishing the surface, and it flags the points where a specialist is the safer choice.
Assessing Your Cast Iron Fireplace Before You Start
Start by looking closely at the piece as it stands. Check for hairline cracks around the firebox, bent or missing hearth fixings, and any areas where the iron has pitted or flaked.
Note how many layers of paint, polish or grime are on the surface. Thick, flaking coats often hide heavy rust underneath.
Watch out: cast iron can crack under thermal shock or uneven support, so do not try to lift or move a heavy section alone.
Gathering Cast Iron Fireplace Restoration Tools and Safety Gear
You do not need specialist equipment for most jobs, but a few items make the work faster and safer. Plan to have these on hand before you begin, and know what each one is actually for:
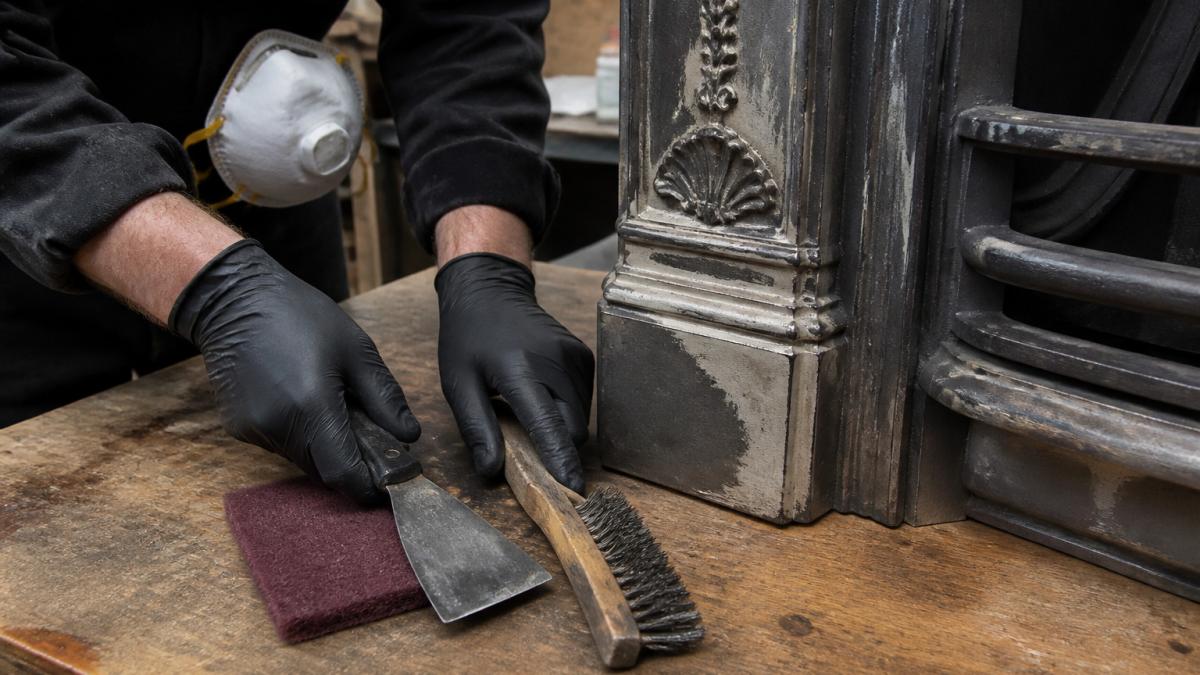
- Wire brushes (brass and steel). Brass is softer and is the safer choice on decorative detail and polished surfaces; steel cuts faster on flat, painted areas but will scratch a finish you intend to polish.
- Abrasive pads and fine sandpaper. Use these for feathering paint edges and smoothing small imperfections, not for stripping large areas.
- A plastic scraper. It lifts softened paint without gouging the iron the way a metal scraper can.
- Degreaser and clean rags. Soot and old polish must come off before any stripper or rust treatment will work.
- White vinegar or a commercial rust remover. Vinegar suits light surface rust; heavier rust needs a dedicated product.
- A stiff brush and a bucket of warm water. For the initial wash-down and rinsing between steps.
Protective equipment you should not skip
Cast iron restoration produces dust, fumes and sharp edges, so treat protection as part of the job rather than an optional extra:
- Gloves. Nitrile gloves protect against strippers and degreasers; heavy work gloves protect against sharp flaking iron and hot components. Keep both on hand and swap as the task changes.
- Safety glasses. Flakes of paint and rust fly when you brush or scrape, and a stray fragment in the eye ends the project for the day.
- A P2 or P3 respirator. Wear one whenever you sand, scrape or use a heat gun. A dust mask is not enough for solvent fumes; check the cartridge or filter suits the product you are using.
- An apron or old clothing. Stripper splashes and rust stains are difficult to remove from fabric.
Ventilation and lead paint
Work in a well-ventilated room with a window open and, where possible, a fan drawing air outwards. Keep children and pets out of the area for the duration.
Old paint on a cast iron fireplace may contain lead, particularly on pieces decorated before the late twentieth century. Careful handling of these hazardous materials ensures the structural integrity of the metal remains intact while you are restoring vintage pieces.
Moving heavy cast iron safely
Cast iron is heavy and can be brittle, especially around thin sections and old repairs. Do not lift a large section alone, and do not drag it across a floor, a sudden drop can crack a firebox or surround that was previously sound.
For finish products, choose a heat-resistant paint or stove black made for fireplaces, and check the label for the maximum temperature it can handle. Ask a specialist about finish options if you are unsure which suits your piece.
How to Clean a Cast Iron Fireplace Before Stripping
Cleaning comes before any stripping. Remove soot, dust and loose debris with a dry brush, then wash the surface with warm water and a degreaser.
Rinse thoroughly and let the iron dry fully before the next step. Any trapped grease will stop paint remover and rust treatments from working properly.
Watch out: never use caustic chemicals on an unknown finish without testing a small hidden patch first.
Removing Old Paint and Treating Cast Iron Fireplace Rust Removal Steps
This is where most of the effort goes. Work through these steps in order:
- Strip the paint. Use a chemical paint stripper or gentle heat from a heat gun, keeping the heat moving to avoid scorching. Scrape away softened paint with a plastic scraper.
- Brush off the residue. Use a brass wire brush to lift remaining flakes without scratching the iron.
- Treat the rust. Soak light rust in white vinegar for a few hours, then scrub with a wire brush. For heavier rust, use a dedicated rust remover and follow the label.
- Neutralise and dry. Rinse the piece and dry it completely. Bare iron starts rusting quickly, so move on to protection the same day.
- Protect the bare metal. Apply a thin coat of rust-inhibiting primer or a light oil, which keeps moisture off the surface until you finish it.
A common mistake is rushing the drying step. Trapped moisture under new paint causes bubbling and flaking within months.
The steps below summarise the core rust and paint removal process in the order to follow it.
| Step | What to do | Time or frequency |
|---|---|---|
| 1. Strip the paint | Use chemical stripper or gentle heat, then scrape with plastic scraper | Keep heat moving to avoid scorching |
| 2. Brush off residue | Brass wire brush to lift remaining flakes | Until bare iron shows |
| 3. Treat the rust | Soak in white vinegar, then scrub; use dedicated remover for heavy rust | A few hours for vinegar |
| 4. Neutralise and dry | Rinse and dry the piece completely | Protect bare metal the same day |
| 5. Protect bare metal | Apply rust-inhibiting primer or light oil | Before rust returns |
Repairing Cracks, Missing Parts and Choosing a Finish
Repair and finish are where beginners most often get stuck, because the right answer depends on the condition of the piece and what you want it to look like. Work through the repair decision first, then choose a finish that suits both the metal and the room.
Deciding what you can repair yourself
Not every crack is equal. Use these rough categories to judge whether to proceed or call a specialist:
- Surface rust and pitting. Manageable at home with the cleaning and rust-treatment steps above. Pitting that has not perforated the metal is cosmetic.
- Hairline cracks in the body or surround. Often sealable with a high-temperature, iron-filled epoxy designed for cast metal. Clean the crack back to bare iron, follow the product's mixing and curing instructions exactly, and do not light a fire until the full cure time has passed.
- Cracks that run through a load-bearing section, the firebox, or a joint. These need a specialist. A repair that fails under heat can be dangerous, and a poor weld or braze on cast iron can crack again nearby.
- Broken or missing components. Grate bars, decorative mouldings, dampers and fixings are often replaceable with period-appropriate parts, but matching size and pattern matters. If you cannot find a match, a specialist restorer or a foundry that works with heritage iron is the safer route.
- Warping or a firebox that no longer sits true. This usually points to heat damage or a failed repair and should be assessed professionally before you spend time on finish.
Choosing a finish
There are three main routes, and each suits a different look and level of maintenance:
- Heat-resistant paint. Gives a uniform, opaque finish and hides minor surface variation. It is the most forgiving option for a piece with mixed patina, but it looks less authentic on a period fireplace and will need recoating over time.
- Stove black. A traditional matt-to-satin black that suits Victorian and earlier fireplaces and is easy to touch up. It shows surface texture and patina rather than hiding it, which is usually what you want on a heritage piece, but it can mark hands and needs periodic reapplication.
- Polished iron. A period-correct shine on pieces that were originally polished, such as some register grates and surrounds. It is the most labour-intensive to achieve and to maintain, and it only works on metal that is sound enough to take a polish.
Apply thin coats rather than one heavy coat, allow each to cure, and follow the manufacturer's temperature-curing instructions before lighting a fire. Where the piece is historically important, a finish that matches the original appearance usually adds the most value, and if you are unsure what the original finish was, look for traces in hidden areas such as behind the surround or under fixings.
Aftercare
Whichever finish you choose, keep the fireplace dry and wipe down soot and dust regularly. Inspect the surface once a year for new rust spots or flaking, and touch up small areas before they spread. A well-finished cast iron fireplace, maintained this way, will hold its appearance for years.
Cast Iron Fireplace Safety Inspection Before Recommissioning
Before you light a fire, inspect the whole installation. Check that the firebox is sound, the flue is clear and lined, and the hearth and surround are securely fixed.
Have a qualified chimney sweep or licensed installer check the flue and connection before first use. Fit a working carbon monoxide alarm in the room, and keep a fire guard in place.
Booking Your Next Step With Restoration Station
Restoration is a project you can start alone, but the bigger jobs, such as cracked sections, missing parts or a full refit, often go better with specialist help. If you want advice on which path suits your fireplace, get in touch with Restoration Station for a quick enquiry.
Frequently Asked Questions
How do you restore a cast iron fireplace?
Start by assessing the fireplace's condition and identifying the material, then decide whether it can be restored in place or needs removing. Clean off soot and loose debris, strip old paint or coatings with the correct method, treat surface rust and protect the bare iron, repair any cracks or missing parts, then apply a suitable heat-resistant finish. Work in a ventilated area with gloves and a dust mask throughout, and allow each stage to dry fully before moving on.
How do you clean rust off a cast iron fireplace?
Brush away loose rust with a wire brush, then wipe the surface with a degreaser. For light surface rust, white vinegar applied with a cloth and scrubbed with a fine abrasive pad can lift the rust, though it needs rinsing and drying straight away. Heavier rust may need a dedicated rust remover. Once the iron is bare and dry, apply a protective coating promptly so the metal does not rust again.
Can you restore a cast iron fireplace yourself?
Many cleaning, stripping and finishing tasks suit a confident beginner who works carefully and safely. Repairs involving cracked firebacks, structural damage, or refitting a fireplace that is set into masonry are better left to a fireplace specialist. Consider the fireplace's age, condition and whether it is heritage listed, and get professional advice before any major work.
How can you tell whether a cast iron fireplace is safe to use?
Before lighting a fire, check for cracks in the firebox and fireback, loose or missing components, and any signs of heat damage. Confirm the flue is clear and that the chimney is in sound condition. If you find any damage or are unsure, have the fireplace inspected by a qualified professional before using it again. Keep the area clear of combustible material and make sure a working smoke alarm is fitted nearby.